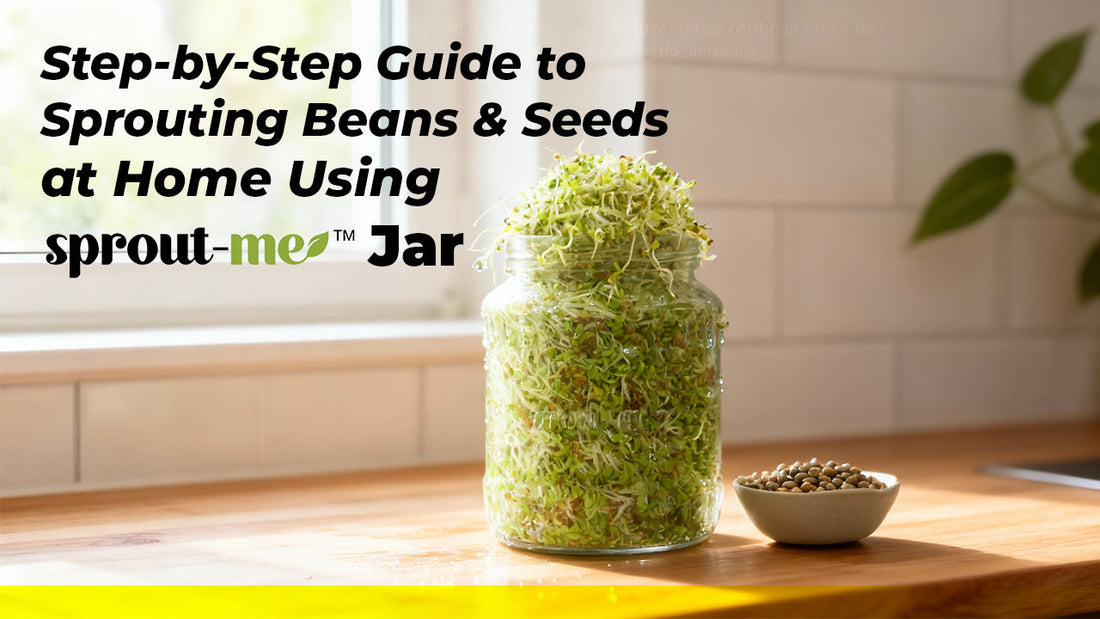
Sprouting is one of the easiest (and tastiest) ways to add fresh nutrition to your plate.
With a SproutMe jar, you don’t need fancy equipment or a green thumb just a few beans or seeds, water, and a little patience.
If you’ve ever wondered how to sprout beans at home or felt unsure about hygiene and timing, this guide is for you.
Why sprouting at home?
Sprouts are packed with vitamins, minerals, and live enzymes.
They’re crunchy, light, and can be used in salads, sandwiches, smoothies, or as a healthy snack. But more than that, sprouting teaches you to reconnect with your food watching a tiny seed turn into living nourishment right in your kitchen.
Best seeds to sprout
Not all seeds sprout well, so it’s important to start with the right ones. Here are some of the best seeds to sprout in your Sprout-Me jar:
- Green gram (moong beans) – classic, quick to sprout.
- Chickpeas (chana) – hearty and filling.
- Alfalfa – delicate sprouts, perfect for salads.
- Fenugreek (methi) – slightly bitter but great for detox.
- Lentils – earthy and wholesome.
Always use organic, untreated beans or seeds for the best results.
Preparing your Sprout-Me jar
Before you begin, make sure your jar is:
- Clean: Wash with warm water and mild soap. A hygienic start = safe sprouts.
- Dry: Ensure there’s no leftover soap or moisture.
- Ready with the right lid: Sprout-Me jars usually come with a mesh or strainer top, which helps with easy rinsing and draining.
Soaking times for different beans/seeds
Soaking wakes up the seed and kickstarts sprouting. Here’s a quick guide:
- Green gram: 6–8 hours
- Chickpeas: 8–10 hours
- Lentils: 6–8 hours
- Fenugreek: 6–8 hours
- Alfalfa: 4–6 hours
Pro tip: Always soak in room-temperature, filtered water.
Rinsing & draining schedule
Once soaked, your beans are ready for sprouting. Place them in the Sprout-Me jar and follow this rinsing and draining schedule:
- Rinse twice a day (morning and evening).
- Drain thoroughly each time — standing water = mould risk.
- Shake gently to spread the beans evenly inside the jar.
This simple routine keeps sprouts fresh and hygienic.
Ideal conditions for sprouting
Sprouts love gentle care:
- Temperature: 20–25°C (room temperature is fine).
- Light: Keep in indirect light too much sun dries them out.
- Air: Good ventilation prevents odour and slime.
Common mistakes (and how to avoid them)
- Mould or slime: Caused by poor drainage — always drain completely.
- Seeds not sprouting: Maybe they’re too old or treated — buy fresh, sprout-safe seeds.
- Sprouts drying out: Increase rinsing frequency in hot weather.
- Bitter taste: You left them too long — harvest earlier.
When are sprouts “ready”?
Most sprouts are ready in 2–4 days, depending on the seed. They’re ready when:
- Tiny white tails (root shoots) appear.
- They smell fresh, not sour.
- They feel crisp to touch.
Once ready, store them in the fridge and consume within 2–3 days.
Final thoughts
Sprouting with a Sprout-Me jar makes the process safe, simple, and fun. By following this sprouting guide, you’ll never have to worry about hygiene, mould, or confusion again. Whether you’re a beginner exploring how to sprout beans at home or someone looking for more hygienic sprouting methods, just remember: soak, rinse, drain, and wait.
Your jar will do the rest — and soon you’ll have a crunchy, nutritious bowl of home-grown goodness to enjoy.